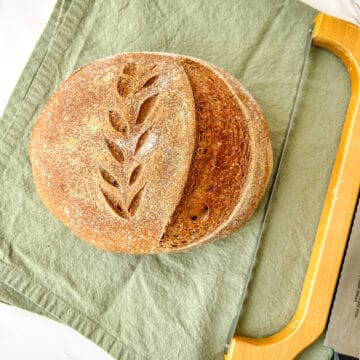
Fresh Milled Flour Sourdough Bread
If you've struggled with dense, heavy loaves when baking with fresh-milled flour, this recipe will change everything. With the perfect balance of tangy sourdough flavor, a light and fluffy crumb, and a crisp, golden crust, this bread is a game-changer for home bakers. The secret? Three unexpected ingredients that enhance fermentation, improve texture, and give your loaf an incredible depth of flavor.
Equipment
- 1 Cambro Food Container Can also use a bowl, I highly suggest you use a clear bowl or container
- 1 Dough Whisk
- 1 Food Scale
- 1 Food Mill
- 1 Food Grade Shower Cap
- 1 Banneton
- 1 Tea Towel or Banneton Liner
- 1 Dutch Oven
- 1 Baking Sheet Not mandatory, but helps to keep the bottom of the loaf from burning
- 2 Measuring Spoons
- 1 Measuring Cup
- 1 Food Scale
- 1 Bread Lame
Ingredients
- 47 g Kamut Grain Berries
- 325 g hard red Wheat Berries
- 130 g sourdough active and bubbly
- 330 g water
- 12 g salt
- 1 tbs the maple syrup
- 1 tbs vital wheat gluten
Instructions
Prepare Your Starter
- The first step is to make sure your sourdough starter is ready to shine. Feed it 6-12 hours before you start baking so it’s active, bubbly, and at its peak.
Mix the Dough
- In a large mixing bowl, combine the water, active starter, salt, and flour. Use your hands to bring everything together—it’s a messy but satisfying process! Mix for about 3 minutes until it’s roughly combined. Cover the bowl with a reusable food shower cover or a clean towel and let it rest for an hour. This gives the flour time to absorb the water.
Stretch and Folds
- Instead of traditional kneading, I like to use the stretch-and-fold method. It’s gentle and feels so soothing. Grab a side of the dough, stretch it up about 6 inches, and fold it over itself. Rotate the bowl slightly and repeat until you’ve done this 3-4 times.
- - For the first 45minutes, stretch and fold every 15 minutes.
- - For the rest of the time, do it every 3 sets of stretch and folds every 30 minutes
Bulk Fermentation
- Cover the bowl and let the dough rest in a warm, cozy spot. Over the next several hours (about 8 for me but can take up to 12 hours), it will double in size. This is the dough’s chance to grow and develop all those wonderful sourdough flavors.
Shape and Chill
- When the dough has doubled, it’s time to shape it. On a lightly floured surface, gently form the dough into a ball by pulling it toward you to create tension on the surface. This will help it rise beautifully in the oven.
- Place your dough into a floured banneton basket or a bowl lined with a floured tea towel. Cover and let it rest in the fridge overnight (12-36hours). This slow proofing gives the bread even more flavor and structure.
Bake Your Bread
- The next day, preheat your oven to 500°F with a Dutch oven inside. When the oven is ready, take the dough out of the fridge, transfer it to a piece of parchment paper, and score the top with a razor or lame.
- Dust the top with a little flour if you’d like to highlight the scoring pattern. Turn the oven down to 450, make sure there's a baking sheet on the bottom shelf and Carecarefully place the dough (on the parchment) into the preheated Dutch oven.
- - Bake with the lid on for 20 minutes.
- - Then bake uncovered for another 20 minutes until the crust is golden and crisp. The internal temperature should be between 210-215
Cool and Enjoy
- Let the bread cool completely before slicing—it’s worth the wait! Typically I wait at a minimum of 2 hours but prefer 3-5 hours of resting time.Then, gather your family, and enjoy the fruits of your labor. There’s nothing quite like fresh, homemade bread to bring everyone together.